I finally found some time and motivation to host my own LLMs on my server - Intel i7 14700F with 80 GiB of RAM and NVIDIA’s RTX 4060 Ti 16 GB. Here’s a quick post on how you can do it to.
The steps are the following:
- Install llama.cpp
- Install llama-swap
- Create a llama-swap config file
- Create and enable llamaswap.service
llama.cpp is known for being a bit cumbersome to setup, especially if you want to run it on your NVIDIA GPU. Since there are no prebuilt binaries, as there are for CPUs, you’ll need to mess around with NVIDIA Toolkit a bit to get everything up-and-running. I found the following guide more than enough to set everything up - https://blog.steelph0enix.dev/posts/llama-cpp-guide/.
As opposed to llama.cpp, setting up llama-swap is easy. Download the prebuilt binaries and add them to a folder that is in your PATH. For me this is .local/bin. Then, you should be able to run llama-swap -h.
You need to create the necessary llama-swap config file. This config file determines how llama-swap should behave. Here’s a current version of my (relatively messy) config file:
healthCheckTimeout: 60

logLevel: info

metricsMaxInMemory: 200

startPort: 8080

models:
  "qwen3":
    # cmd: the command to run to start the inference server.
    cmd: |
      llama-server -hf unsloth/Qwen3-30B-A3B-Instruct-2507-GGUF --ctx-size 32768 --jinja -ub 2048 -b 4096 --host 0.0.0.0 --port 8081 --temp 0.7 --top-p 0.8 --min-p 0.0 --top-k 20 -ngl 32

    # name: a display name for the model
    name: "Qwen3 30B A3B Instruct"

    # proxy: the URL where llama-swap routes API requests
    proxy: http://127.0.0.1:8081

  "qwen3-coder":
    # cmd: the command to run to start the inference server.
    cmd: |
      llama-server -hf unsloth/Qwen3-Coder-30B-A3B-Instruct-GGUF --ctx-size 32768 --jinja -ub 2048 -b 4096 --host 0.0.0.0 --port 8082 --temp 0.7 --top-p 0.8 --min-p 0.0 --top-k 20 -ngl 32

    # name: a display name for the model
    name: "Qwen3 Coder 30B A3B Instruct"

    # proxy: the URL where llama-swap routes API requests
    proxy: http://127.0.0.1:8082

groups:
  # group1 works the same as the default behaviour of llama-swap where only one model is allowed
  # to run a time across the whole llama-swap instance
  "standard":
    # swap: controls the model swapping behaviour in within the group
    swap: true

    # exclusive: controls how the group affects other groups
    exclusive: true

    # members references the models defined above
    members:
      - "qwen3"
      - "qwen3-coder"
I host a llama-swap proxy server on port 8080 and host each model on a seprate port. This is not necessary since I cannot have two models loaded in the GPU at the same time, but this just makes the setup a bit cleaner in my opinion.
Also, you’ll need to play around with the llama-server a bit to see which models you can run.
And finally you need to create the llamaswap.service file. Run the sudo nano /etc/systemd/system/llamaswap.service and enter the following:
[Unit]
Description=Start llama-swap service
After=network.target

[Service]
Type=simple
User=<your-user>
WorkingDirectory=<path/to/llama-swap-config>
ExecStart=</path/to/>llama-swap -config </path/to/>llamaswap.yaml
Restart=on-failure
RestartSec=10

[Install]
WantedBy=multi-user.target
You might need to enter the additional environment variables if your llama.cpp binaries are not in the .local/bin and if your llama.cpp cache is also somewhere else:
Environment=PATH=/path/to/llama.cpp/build/bin
Environment=LLAMA_CACHE=/path/to/llamacpp_cache
Add these just after WorkingDirectory entry.
And that is it. You need to run the following:
sudo systemctl daemon-reload
sudo systemctl enable llamaswap.service
sudo systemctl start llamaswap.service
sudo systemctl status llamaswap.service
You should see the something like:
● llamaswap.service - Start llama-swap service
     Loaded: loaded (/etc/systemd/system/llamaswap.service; enabled; preset: en>
     Active: active (running) since Sun 2025-09-28 07:20:51 UTC; 42min ago
   Main PID: 1053 (llama-swap)
   ...
You should now be able to access the http://localhost:8080 and see the llama-swap ui.
I wanted to start a blog for some time now, but couldn’t find a setup that would
meet my requirements.
My requirements for a blog were:
- Easy deployment via Github Actions and Github Pages,
- Simple, content-first theme with support for tags, math, and customizable syntax highlighting, and
- Support for comments
After some search I rediscovered Hugo Flex.
In this blog post, I’ll share with you how you can setup your own blog with Hugo, Hugo Flex theme,
Github Actions for automatic build and deployment to Github Pages.
To test everything locally, you’ll need to install Hugo. Download the binaries you need from the
releases page. Since I’m on Pop Os, I download the *_linux-amd64.deb
binary and install the hugo on my machine.
To test if the installation was successful, open up your terminal and run hugo version. You should see
something like the following:
$ hugo version
hugo v0.139.4-3afe91d4b1b069abbedd6a96ed755b1e12581dfe linux/amd64 BuildDate=2024-12-09T17:45:23Z VendorInfo=gohugoio
If the installation was successful, we can proceed to create the initial blog.
To setup a blog, you should create a new hugo site:
$ hugo new site myblog --format yaml
This will create a new folder named myblog with the following contents:
myblog/
├── archetypes/
│   └── default.md
├── assets/
├── content/
├── data/
├── i18n/
├── layouts/
├── static/
├── themes/
└── hugo.yaml         <-- site configuration
We now have a basic template for your blog. Now we’ll add the Flex theme.
First, initialize the myblog as a repository:
Now add the Flex theme as a submodule:
git submodule add https://github.com/ldeso/hugo-flex.git themes/hugo-flex
And, finally, add the theme: hugo-flex at the end of hugo.yaml configuration file.
Running the hugo serve --buildDrafts from inside the myblog folder, you
should be able to open the following page:
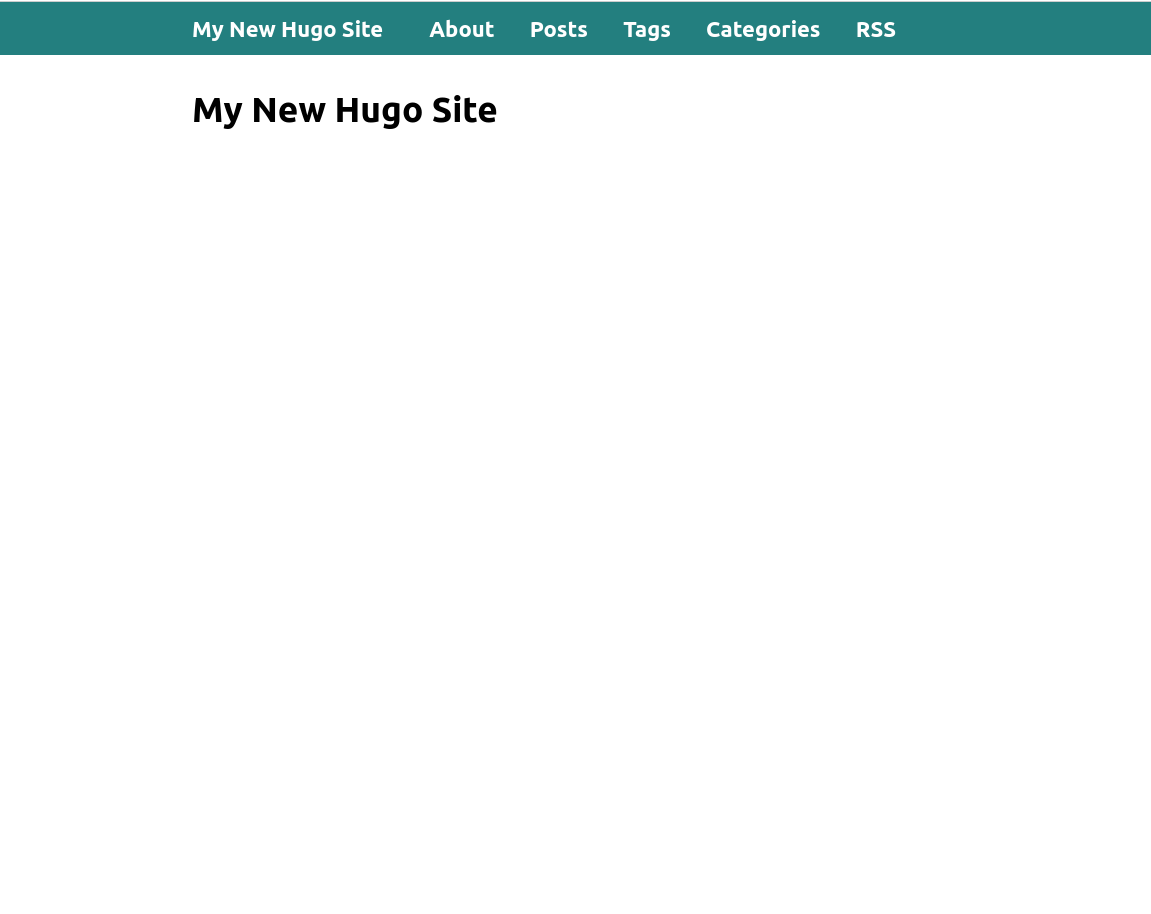
If you see the image above in your browser, this is great. Your local setup
is working and you can proceed to adding GH Actions for automatic builds and deployment.
Run git add/commit to save your changes and git push to push them to Github
(setup a repo on GH and add the remote to your local repo if you haven’t done that already).
Fortunately, there is already a ready workflow that builds and deploys the
blog to GH Pages. To add one to your blog, create a publish.yml in .github/workflows
inside your blog folder and add the following content:
# Sample workflow for building and deploying a Hugo site to GitHub Pages
name: Deploy Hugo site to Pages

on:
  # Runs on pushes targeting the default branch
  push:
    branches:
      - main

  # Allows you to run this workflow manually from the Actions tab
  workflow_dispatch:

# Sets permissions of the GITHUB_TOKEN to allow deployment to GitHub Pages
permissions:
  contents: read
  pages: write
  id-token: write

# Allow only one concurrent deployment, skipping runs queued between the run in-progress and latest queued.
# However, do NOT cancel in-progress runs as we want to allow these production deployments to complete.
concurrency:
  group: "pages"
  cancel-in-progress: false

# Default to bash
defaults:
  run:
    shell: bash

jobs:
  # Build job
  build:
    runs-on: ubuntu-24.04
    env:
      HUGO_VERSION: 0.139.4
    steps:
      - name: Install Hugo CLI
        run: |
          wget -O ${{ runner.temp }}/hugo.deb https://github.com/gohugoio/hugo/releases/download/v${HUGO_VERSION}/hugo_extended_${HUGO_VERSION}_linux-amd64.deb \
          && sudo dpkg -i ${{ runner.temp }}/hugo.deb
      # - name: Install Dart Sass
      #   run: sudo snap install dart-sass
      - name: Checkout
        uses: actions/checkout@v4
        with:
          submodules: recursive
          fetch-depth: 0
      - name: Setup Pages
        id: pages
        uses: actions/configure-pages@v5
      - name: Install Node.js dependencies
        run: "[[ -f package-lock.json || -f npm-shrinkwrap.json ]] && npm ci || true"
      - name: Build with Hugo
        env:
          HUGO_CACHEDIR: ${{ runner.temp }}/hugo_cache
          HUGO_ENVIRONMENT: production
          TZ: America/Los_Angeles
        run: |
          hugo \
            --gc \
            --minify \
            --baseURL "${{ steps.pages.outputs.base_url }}/"
      - name: Upload artifact
        uses: actions/upload-pages-artifact@v3
        with:
          path: ./public

  # Deployment job
  deploy:
    environment:
      name: github-pages
      url: ${{ steps.deployment.outputs.page_url }}
    runs-on: ubuntu-24.04
    needs: build
    steps:
      - name: Deploy to GitHub Pages
        id: deployment
        uses: actions/deploy-pages@v4
Compared to the original workflow I:
- explicitly use ubunut-24.04 instead of ubuntu-latest, and
- I commented out Dart Sass installation.
Commit, push the changes, and go to your repository settings to enable GH
Pages.
You should now have successfully deployed your blog to the Internet. Excellent.
We are left with only two steps, changing the syntax highlight theme and
enabling comments.
For my blog, I’m using a Github syntax highlight theme. Run the following
command to change the syntax highlight theme for your blog:
hugo gen chromastyles --style=github > assets/css/syntax.css
You can check how the syntax highlighting will look like by creating a post with
a code snippet and run hugo server --buildDrafts.
To finish preparing our blog, we’ll enable giscus as our app for comments.
Giscus uses GitHub Discussions for enabling comments on your blog so you’ll need
a public repo with enabled Discussions. This repo can be either your blog repo,
if your blog’s repo is public, or any other public repo. I’m using a separate
repo, named blog-comments, since my blog repo is private.
To start, install the giscus app
for the chosen repo. Once the app is installed, create a config for your
comments. For my own blog, I’ve chosen the options Discussion title contains page <title>,
Announcements type for discussions, loading the comments lazily, and GitHub Light theme.
Copy and paste the generated config with the jinja if statement to
layouts/partials/comments.html (you’ll have to create the file):
{{ if not .Params.disableComments }}
<!-- generated config goes here -->
{{ end }}
The additional jinja if allows you to disable comments for certain pages. You
just have to add disableComments: true to the yaml header of the markdown.
By default comments are enabled on all pages.
To check that comments are enabled, rerun the server and check the post from
the previous step (i.e. syntax highlighting). At the end of the post you should
see a comment box.
And with that, you are done. You should have a working blog with continuous
builds and deployments to GH Pages, customized syntax highlighting, and comments.